• There has been a recent cluster of spammers accessing BARFer accounts and posting spam. To safeguard your account, please consider changing your password. It would be even better to take the additional step of enabling 2 Factor Authentication (2FA) on your BARF account. Read more here.

How I did it: Uncorking a 2006 KTM 625 SMC

Jakemate

Pastafarian Minister
Joined
Sep 26, 2004
Location
On a plate, man. On a plate.
Moto(s)
The kind that roll me to the noodle house.
Name
Reverend
BARF perks
BB6 Slow Race Winner
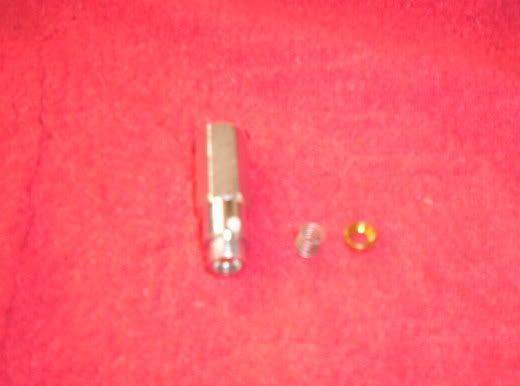
Tools:
Vice.
Bastard File.
Small, cheap drill press.
Hand held drill.
1 & 1/8th”, (1.125”), hole saw and arbor.
Barrel shaped grinding stone.
Cheap pop riveter W’ rivets.
Tin snips.
Cheap Hacksaw
Hand tools for fairing removal, etc.

Disclaimer:

Motorcycling is dangerous. In my opinion, one way to mitigate the danger is to know your machine. If you are comfortable that all of your fasteners are tight, thread-locked, safety wired, etcetera; it, (again in my opinion), will make your motorcycling experience more enjoyable. If you are not comfortable with working on your own shit, find a good mechanic. BARF is full of them. Anything you decide to do to your own motorcycle is at your own risk.

Any maintenance, modifications, (or general fucking with), may void your warranty, :)laughing it says in the KTM manual that if you do your own oil change, it voids your warranty :finger). If you modify your motorcycle and use it on road; you may be subject to state/federal/local prosecution. Again, any work you perform on a motorcycle is at your own risk. If you don’t perform your own oil changes/valve adjustments/carb.tuning/clutch work/general maintenance/etcetera; you may not want to look at this.

I have compiled this photo-doc. as I perform the modifications necessary to have a properly running track toy. A lot of information is out there for the LC4, but I thought I’d give it some pictures. :teeth

The modifications performed herein may be dependent on one another to function properly. Performing one modification and not another, may cause serious damage to your motor. If you do not feel comfortable with adjusting your mixtures, you shouldn’t try. If your mixture is off, you will damage your motor.

These mods are performed with about as basic of tools as I could personally stand to use. I did my best to use tools the average hobbyist or homeowner would have. Consider it the sophisticated caveman way.

If you are n00bish and would like to learn the basics, make sure to check out advrider. http://www.advrider.com/forums/showthread.php?t=86958

I’m skipping a lot of basic removal stuff. If you can’t take off your fairings, tank, etc, you may not want to play with this stuff.
 
Last edited:
I think that about covers the idiot clause. Let’s pop the cork on a 2006 LC4 625 SMC.

If you’ve read this far, you’ve probably already found out about the “problems” the off the shelf SMC has.

1. Throttle stop. You only have ¼ throttle. That’s NFG!
2. Lean throttle mixture. Again, NFG!
3. Airbox/exhaust restrictions :rolleyes
4. Smog. :green

The throttle stop, airbox, exhaust and smog can be fixed on the cheap. The mixture can be fixed with a JD jet kit, (JDK007). I got mine from Thumpertalk. They give you a 20% off coupon when registering.

Let’s pull out the smog first. You’ve got three hoses, one from the gas cap to the canister, one from the canister to the airbox and one from the canister to the atmosphere, (open hose).

You can take the hose off of the gas cap and either

1. Use a gas cap vent.
2. Add a catch can and route your vent tube to it.

I went with the vent. I’m silly like that. When I get yelled at, I’ll zip tie the catch
bottle on.

Next is this fitting on the airbox, we need to plug it.

100_0565.jpg


I used a spare vacuum plug.

100_0566.jpg


When you’re done, you should have a pile like this.

100_0564.jpg
 
Last edited:
Let’s move on to the mixture problems. The JD jet kit has a great set of instructions. You can do all the modifications with the carb in the SMC. It would be pointless to reiterate the instructions on the kit.

I took the carb out to try to get some decent pictures of the needle set screw, (as the bike ages, carb removal may be important for bowl cleaning anyway). Remember to turn off your fuel before disconnecting the fuel line. I always leave the fuel line attached to the carb and plug the open end.

Remember, I only removed the carb for clarity, but am including the pictures for reference in case it becomes necessary for someone to remove their carb. If you follow the instructions in the JD jet kit, you won’t need to remove the carb.

*WARNING* If you are not familiar with routing and adjusting throttle cables, do not attempt to remove your carb. If reinstalled improperly, it can lead to a lifethreatening situation.

You have to cut one zip tie, unplug one harness connector, one pigtail connector from the carb. and one airbox vent hose. Disconnect the throttle cables, loosen the manifold and airbox boot clamps and free the carb. Remove the carb upward, through the frame, in a twisting fashion.

100_0590.jpg


100_0589.jpg


100_0587.jpg


Don't forget to cover your intake!


Here’s the top of the carb that cover needs to come off to access the needle set screw. That’s the part that is restricting the throttle. It also holds in the metering rod that needs to be changed. There are a few ways to fix the needle set screw, get the short KTM set screw, get an FCR MX set screw from SUDCO, (P/N 021-727), or modify the one you have. Let’s save a tank of gas, shall we?


100_0543.jpg


There she is.

100_0544.jpg


Here it is at full throttle. That’s a lot of screw to cut down! Mark the screw just above the slide. That’s where you will cut later.

100_0545.jpg
 
Last edited:
Here’s the screw, spring and buffer.

100_0551.jpg


The part that needs to be cut is round; the part above it is hexagonal. Holding the screw in a vice and using a bastard file, I followed the angles on the hex; carving angles in the round. Remember to copy your mark before it gets filed off.

100_0553.jpg


100_0552.jpg


I did this to make it easier to center a screwdriver slot in later. Trying to guess the center on a round is tiresome. It also helps to hold the small piece in the vice.

You can face off the part, (make the head flat), by holding your file in the vice.

100_0554.jpg


I was unable to get a decent picture of cutting the slot in the top, so bear with the written explanation.

If you filed a bit of hex into the round portion of the screw, you can hold opposing flats with each jaw of the vice. You should have a corner facing lengthwise in relation to the jaws < > . All you have to do is hacksaw a groove across the corners. That saves eyeballing for center and having a seriously off center groove. Test fit a couple of screw drivers in the slot.

You can finish off the corners much the same way as you faced the part. It should look like this, (well, maybe less fuzzy :laughing).

100_0557.jpg


You can now install the JD jetting kit and your modified set screw.
 
Last edited:
Now that you are running too rich, it’s time to let the motor breath. Let’s start with the airbox.

Here comes the flame bait.

KTM offers a screened airbox cover, as well as a screened side cover. While the side cover looks pretty cool, the thought of water getting through there kind of scares me. I decided to just keep the airbox open under the seat. I’m going to keep a filter on the engine, so I don’t see a big need in a screen over my intake holes.

Airbox top.

100_0622.jpg


A little therapy with a 1 & 1/8th” hole saw. Why 1& 1/8th”? That’s what you need for the exhaust!

100_0627.jpg


Then there are the snorkels.
100_0624.jpg


I’ve read that people remove those. I really can’t see how much more airflow you could gain that way. I’m sure this will flow more…..

100_0625.jpg


100_0626.jpg


Don’t forget to vacuum out your chips!
 
Last edited:
Time to get rid of that Briggs N’ Stratton sound and improve exhaust flow.

Here’s what the stock exhaust consists of.

100_0594.jpg


There’s an exhaust pipe inlet, two glass packed cores with a straight through design and the exhaust tip. The tip is where the restriction is. We need to remove the tube that is redirecting the exhaust flow. We’ll leave the glass in the can. If you take it out, the bike is going to sound obnoxious and tinny.

So, all that has to come out is the tip. The tip is riveted in. The rivets need to be drilled out. KTM uses some John Wayne, rough ‘em, tough ‘em, ain’t givin’ into YOUR shit, rivets. I believe it is easiest to drill the top off, and then drill the center. You can do this with a hand held drill.

First, I used a drill just a little smaller than the head of the rivet.

100_0592.jpg


Then a smaller bit for the center.

100_0610.jpg


If you have a small drill press, or have access to one, it’s a lot easier.

100_0608.jpg


100_0611.jpg


After you drill the rivets all the way through, the tip pulls right out.

100_0612-1.jpg


Notice that the tube is attached with two tack welds and a welded strap.

100_0595.jpg


Leave the strap in place for the time being and hold the tube in the vice. The 1 & 1/8th” hole saw I used took some time to work down the outlet, but cut in the perfect spot.

100_0616.jpg


100_0598.jpg


Drill all the way through the piece, until the tube is no longer part of the outlet.

100_0618.jpg
 
Last edited:
Next, cut the strap with tin snips.

100_0619.jpg


Here's what the the tube is like when cut out. Pretty good, eh?

100_0599.jpg


Now you have a big exhaust hole with sharp edges.
(Notice Nacho is NOT impressed with sharp edges).

100_0605.jpg


Let’s take care of that with the barrel shaped grinder and a hand drill.

100_0604.jpg


Alright, pop rivet those suckers on and reinstall the pipes! When I install slip fits, I always use high temp black RTV silicone. I’m weird like that.

100_0621.jpg


Well, that’s about it. Slappy some fairings back on and adjust some idle mixture!
 
Last edited:
Awesome write up man! I'm sure it'll be super helpful to the 1 other BARFer with a 625 SMC :twofinger

Now that the orange briggs and stratton is back together, you coming out to PC on Thursday?
 
Gigity-gigity, gigity-goo.

Yeah, That'll be about the last I can ride; until I'm recovered.

I've got to get used to riding the bike, now. I took it out for a ride a few minutes ago. The performance gain is staggering.
 
Make that 2:twofinger

wilit said:
Awesome write up man! I'm sure it'll be super helpful to the 1 other BARFer with a 625 SMC

Nice documentation, all i have done is the Thottle stop, and the drilling the pipes. It did make a big difference, but i need to rejet and open the airbox like you did. I am sure the will help a bunch.
 
Nice write up. Makes me glad my KTM came will all the requisite Balls from the factory.

Course, your's came with an FCR...
 
Thanks, all!

I'll get some pictures of it all together thursday, (when I'm around someone with a better camera :laughing).

About the only thing I dislike about it is the whole oil change deal. :wtf Who puts 300 drain bolts on a single, makes you hook up an I.V. AND THEN bleed the system. :confused

Well..... Reaching in to get the feeler guage between the valve top and tappet kinda sucked too.....
 
Thanks for taking the time to do this!

Now, if you could only help me decide between a 625 smc and Duke II I'd be ever so grateful....
 
Nice work!


Dosent the KTM´s come with an adapter for the throttle stop,a needle for richer jetting, and a bigger main jet in the states?
(but with the instructions for racing only)

At least here they come in a little tube that are attached to the steering bar or in the "ready to race folder".
 
Peoples Republik of Kalifornia.....

They wouldn't want that to go with the bike. :(

:rolleyes instead you have to buy it seperate. :laughing

<edit>

You can play with the stock needle, but the JD kit comes with several parts for different altitudes. Kinda nice, takes some thought out of doing the work. And, no, no extra jets with the bike. Cal. EPA would have a cow.
 
Last edited:
Derestricted Bike is Amazing!

Thanks so much for posting the derestricting proceedures for the 625 smc! I just finished my exhaust and am getting the JD kit installed this weekend. I can't believe this is the same bike I brought home a few months back. I am hoping the JD kit will be the icing on the cake, but thankis again for a great, easy write up!:applause :teeth
 
JD Jetting and TPS Unplug Complete!

I just finished installing the JD Kit and unplugging the TPS on the bike and NOW I have an amazing machine! I can't believe how well the bike runs, and how much power it has on tap. This is what the bike is supposed to feel like, and its what you should do to have what KTM intended; Ready To Race.

:nerd
 
Hey thanks for the write up! Your thread lives on!!! MUCH appreciated.

Though I will say i got a headache from looking at your photos of the carb screw mod. I think i will wait on this one, even though its important, because I ARE STILL CONFUSED! :nerd

either way thanks man!
 
Back
Top