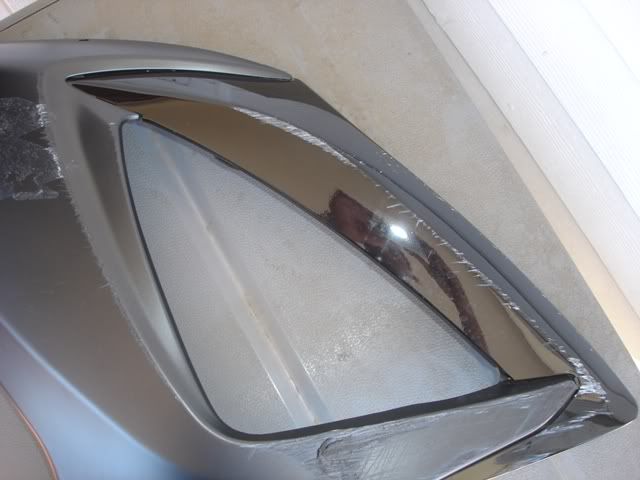
• There has been a recent cluster of spammers accessing BARFer accounts and posting spam. To safeguard your account, please consider changing your password. It would be even better to take the additional step of enabling 2 Factor Authentication (2FA) on your BARF account. Read more here.

What is a better do-it-yourself plastic repair

For a newbie:), your work is looking good so far,

Ok so you put a loooooooooooooooot of filler on, no problem. When you apply the stuff you try to get as close to the desired surface contour as possible. Also try to avoid the "holes" in the middle of the filler area. This makes it a lot easier to sand it down to the exact perfect foundation that you are after.

One of the hardest parts of making the filler on parts look sexy is eliminating the edge between the two. Keep this in mind when you take the next step.

When you sand this down here are some tips to follow:

1. try as hard as you can to not bite into the surrounding "OEM" plastic part surface.

2. less pressure more friction. This eliminates one of the biggest mistake in foundation work----scratches. If you want to have more of a bite then increase the coarseness of your sand paper, do not apply more pressure. Also gradually step up the grit of your sandpaper (120--->220---->320--->400 ect.)to create that super nice surface that you are after. This philosophy also applies to clear coat wet sanding in a big way.

3. Primer will heal most wounds but try to get as much of a finish surface with your sanding as possible. Shooting too much primer to fill in a crappy surface is not a good thing because too many layers will decrease your overall flexibility. You want to use as little primer as possible while at the same time filling in any imperfections.

4. Also look into a primer sealer. This stuff is the shit. Sprays like paint and make your final surface as smooth as glass.

Later,

Oz
 
your work looks good, but here's a tip:

since you have to sand most of the filler off, after a couple of times, you'll see if you spread it THIN, you have less to sand off.

I know a paint guy that takes this to extremes: he was telling me about a buddy of his working on a trunk lid on some vintage heap, and he pretty much had to skim coat the entire trunk lid with body filler as it had hecksta dimples and dents, so he got a carpenters saw blade that was long enough, and used that as a spreader for the filler, after mixing he blopped a line on the upper trunk, and drew the blade back so it was nearly perfect with just one pass, after curing he just gave it a quick pass with some 80 grit again on a long carpenters level he used as a sanding block, primed and painted.

just trying to illustrate that it's really MUCH easier, less work, and you get better results with just a skim coat of filler, and I never met anyone in nearly 20 years at this who loved to sand things down, so I'm sure most of you will be with me on this. :D

:ride
 
Last edited:
Hey guys i got alot of sanding done today. But i ended up scratching the plastic with a 100 grit paper. :(

I didn't wet sand it at first. I did it dry with 100 first and then 400 dry. i then finished it off with a 400 wet sand to 1000 wet. My biggest concern was the big gouge but that came out pretty smooth.

I did get pin holes though :(

check out the progress.
fairingproccesssand002.jpg

fairingproccesssand022.jpg

fairingproccesssand024.jpg
 
Last edited:
you need the bulldog so that the fillers and primers and paint will stick to that "milk bottle" plastic, so yes anywhere you have bare plastic, BEFORE TOPPING WITH ANYTHING, should have a couple of coats of bulldog under it.

so (example), FIRST you clean the thing with detergent and HOT water, then you sand THE ENTIRE FAIRING with 400 wet, THEN you sand the damaged area with 100 grit dry to rough it up and "de-burr" the area, followed by a pass with some 220 (thats per the bulldog label). this will seem confusing as to why all the different grit papers and stuff so here's the thinking behind WHY you choose certain grits for certain areas:

areas with no damage can be painted over directly with no primer after sanding completely dull, you typically use 400- to 1000 wet for this. areas with just sanding scratches at 180 or finer can be painted after priming and sanding with 400-1000 wet. areas with coarse sanding scratches like 40, 80, or 100, will need a skim coat of glazing putty*, which needs to be sanded with 180 and PRIMED before painting. areas with deep damage, or weld seams will need a coat of filler, which needs sanding with 80-100, which will expose pinholes, which need the glazing putty. PROBLEM plastics (olefins, alloys) will need an adhesion promoter BEFORE TOPPING WITH ANYTHING, most adhesion promoters need a scuffed surface to stick, bulldog wants 220-320 before spraying, and there ya go. whew!

so the idea is yo only work as hard as you need to: the entire fairing will be painted, so sand everything but the damaged areas with the 400-1000 wet so thats now ready to go. now you go at the damaged areas, and when done you'll have a primed area where the damage WAS, thats now primed & sanded with the same grit as the rest of the fairing, and now it's all ready to paint,....see?

ok, wait for the bulldog to dry, and then apply the filler RIGHT over the bulldog, and when cured sand that flat, now for the pinholes you use *GLAZING PUTTY (I like metalglaze from evercoat) which is just runny body filler, you skim a super thin coat of mixed glazing putty JUST OVER THE FILLER with the pinholes, and then when that cures (bout 10 minutes) sand the pinholes flat with 220.
NOW before you prime, you'll have some bare spots of plastic where you were sanding, so spray the bulldog evenly all over everything that you worked on (remember bulldog is kinda like a primer), which includes those bare spots exposed by sanding.

THEN you spray the primer to cover ALL the scratches you made, then sand the primer (always with a block of some kind) to the same grit as the rest of the fairing you did before hand.

one more note: "HIDING" depending on how well the paint you are using "hides" (covers whats underneath) you may want to shoot primer on the entire fairing even though most of the rest of the fairing really doesn't NEED primer (no deep scratches right?) but say the yellow you chose won't hide unless you spray a billion coats, which would cost way more money and makes for an easily damaged paint finish, instead have all the parts one even color (whatever color the primer is) so you don't have to spray so many coats to get the target color, and (worse) you don't get a spot develop where the primer was months later as the paints shrink, and become thinner as they cure.

it's not so complicated once you understand WHY we choose certain grits for certain things, we are lazy :D, and don't want (and some can't afford too as they are in business) to work harder than needed.

~peace, love and isocyanates
 
Last edited:
another pm Reckon:(

So since i've been working on these plastics, I decided i would do an under cowling and the right side fairings aswell. but i accidently put the filler over the plastic without the bulldog spray.

What will most likely happen and what can i do now?
 
Last edited:
Is the SEM "flexible primer" what i need?

So, Reckon i'll most likely get those plastics to you by either Fri. or Sat. :thumbup
 
you can use the SEM flexible primer, but really it's not needed.

automotive type paints are not at all like housepaint, where you take 4 or 5 mls thickness and it'll crack, rather think of automotive paints as more of a plastic bag type of coating, it's just already super flexible, so the SEM is just not needed.

I'll suggest U-Pol products for you, because your down here in the southbay, and they are available at LOWE PAINT CO., on phelan, off of monterey highway.

get their high build primer and the clearcoat, then all you need is a decent basecoat, like a custom spray can (also available at LOWE PAINT CO., or something from color-rite, or cycle-color.

you can also order teh custom spray cans online, google (you guessed it) CUSTOM SPRAY CAN and you'll get a BUNCH of hits with many, many places that'll make custom spray cans.
(which is genuine automotive basecoat in the cans)
 
Hey RECKON can you check your PMs


Like i said in the PM i think there are more cracks than I pointed out.


The Crack is located on the back side of this fairing where the yellow circle is.
It is located by the tab.

fairingproccesssand015.jpg


ReggaeMusicinthepark008.jpg


The second should be on the plastic that needs the tab replaced. Behind the filler on the backside. The yellow circle should indicate it's location.

fairingproccess016-1.jpg
 
UPDATE!!!

So i just put 4-5 coats of SEM high build primer. Finally!!!!

And what i didn't want to happened DID. The primer revealed flaws. It exposed "under sanded body filler" and in one spot the primer began to crack.

Another flaw was a crack that Reckon welded from behind still shows in front. Can these issues be resolved without having to start all over?

Some pictures below to show progress and flaws (pictures not very good)


The crack that was welded.
primerfairings2008.jpg


This one is where the primer began to crack.
primerfairings004.jpg


another picture of cracked primer (same spot as top pic)
primerfairings2011.jpg


This is where the big gouge was. Maybe needed a little more sanding?
primerfairings007circle.jpg


Another (different angle)
primerfairingscircle.jpg


Over all pretty good.

Before
plastics004.jpg


After
primerfairings2017.jpg
 
GLAZING PUTTY, remember I told you that the primer would only cover so much? and that for deeper scratches, pinholes, and rough sanding scratches a skim coat of GLAZING PUTTY fills in the scratches, then you sand that flat with about 220-320 (DRY) then blow on a couple of more coats of primer, let cure (24 hours) then sand with 400-600 (wet is ok here) and dry off, wipe with 50%-50% rubbing alcohol and water (or wax & grease remover) and then start shooting your color coats. (you can skim the putty over the primer after sanding the primer with 180-220)

plus it looks like that primer is NOT sanded, so when you BLOCK SAND IT, IF the primer is thick enough, you will lose some of those defects, just not those deep pits.

for the weld seam you can still see, you don't have enough filler on there, or you over sanded it (most likely), so that'll need to be roughed up with 100 grit, and the filler re-applied, and then re-shaped using 180, followed by a quick pass with some 220, then skim THAT with glazing putty (for the pinholes), sand the putty with 220, and then blow on two or three good primer coats, let cure, sand, and paint.

if you are expecting professional results, then you'll have to use both professional products, AND techniques.

I'll add that sanding is boring, tedious, messy and just no fun at all, whereas painting is fun, fast and neat! the point is 99% of all noobie painters tend to hurry through the boring part, and then get to the fun painting part too early, and they end up either completing the project like it is, or having to re-do alot of work (MORE SANDING), so don't be in a hurry to paint, get the surface FLAT, with only super tiny, or NO defects, because as you found out, primer will only cover so much, and paint (color coats) will actually HIGHLIGHT the defects, not hide them as most new painters believe.

keep at it, your almost there. :ride
 
Last edited:
Can some one tell me why this primer keeps cracking???

N.M. problem solved...
 
Last edited:
I'm not sure what you mean by cracking, can you post a pic?

just for reminders sake: the cracks have been welded, so you spray the bulldog on the bare plastic area, and wait for it to COMPLETELY DRY (follow the directions on the can), then you apply a thin coat of the filler and let cure for 30 minutes, then sand if as flat as you can with 100-120 grit (DRY) using some kind of sanding block that's slightly longer than the repair area (insures a level repair), then check for pinholes, or bubbles or low spots, if you have some (normal) use the glazing putty to fill those tiny imperfections, because the primer won't be thick enough after sanding to hide those. then sand the glazing putty with 180 (dry) again with a block that's longer than the repair area, now you spray more bulldog on any bare plastic spots you made while sanding the filler & putty, and then you shoot the primer, probably 4 coats, now wait over night.
the next day you WETSAND the primer using 400 or 500 grit, use a soft block (you can wrap the paper around a sponge), till it's smooth and even, don't sand off too much or you'll have to re-apply it, and sand it again. once everything's sanded, the repairs should be level, and you should have a nearly perfect surface, ready for the color coats.

when you apply primer, it will follow the contours of the surface, UNTIL YOU SAND IT LEVEL, so when you shoot the primer, you might still see a tiny line where the crack was, but after sanding with the block, you won't,...IF you followed the above instructions.
if you get the primer too thick (more than 5 coats, it can get brittle, and crack, also don't bend the fairings very much, they won't flex much at ALL on the bike, and you wont need to flex them much to install them, so if your bending the pieces more than they would normally, then yes, you might crack the repair down to the filler, which would look like a crack in the primer.
also if you have a crack in the filler and then paint over it, then there's no structural strength, and the paint will split because paint's not meant to hold cracked filler together.

post some pics, and I can maybe pinpoint what's wrong.

(also the sticky at the top of the list has all this info in it and much, much more)
 
Last edited:
What reckon said, Making sure that the surface is dry is absolutely super important.

Another possiblity is not throughly mixing the primer. It is easy to forget with rattle cans, but you really gotta shake that badboy for a min before you spray.

Pics FTW
 
This might sound lame, but I have repaired cracks in abs plastic by melting it together with a soldering iron. It was a clean break and didn't need repainting, so I repaired it on the inside and got some scrap abs from tap plastic to melt is as filler.
 
Back
Top