• There has been a recent cluster of spammers accessing BARFer accounts and posting spam. To safeguard your account, please consider changing your password. It would be even better to take the additional step of enabling 2 Factor Authentication (2FA) on your BARF account. Read more here.

RZ350NC2 Resto Mod

Great pics.
The paint looks like it should be pretty hardy. Looking forward to seeing it for myself after a year or two of use.
Sorry about the dowel incident, but it sounds like you took it in stride.
Keep 'em coming!
 
"took it in stride"This was one of those you had to be there moments. You might've made a different comment. :laughing

3 vacations, a family sized dose of really nasty Covid, and work sure have gotten in the way of keeping up with this. I am much better at keeping up with my YouTube channel if anyone is interested in following along.

I’m attempting to get a few entries in this morning.

6/5/22
Assembled clutch side cover. New OEM Yamaha
Water pump bearing, seal and gasket.
MacDaddy Racing water pump cover with drain.
Oil pump seal and gasket.
Kick start seal.

Made 24 videos and 1 photograph.

t24Yaz6.jpg


Started assy of power valves but noticed no chamfer on the ports after the bore job. Damn it.

Brian said “shit, I forgot” and to bring them back and he will fix them. Too much driving time so I set up to do it myself. This porting tool has really done me well.

7pUgm59.jpg


PiafUzO.jpg


vtnBGfZ.jpg


Refurbished the 40T rear sprocket

Y1PHqhQ.jpg
 
6/6/22
Engine bottom end clutch and stator assembly. Very few photos again.

Upgrades include aftermarket clutch, 3 stock springs and 3 stiff springs.

hXpqYTn.jpg


Aftermarket shift detent and pancake bearing.

eRtOUbx.jpg


LehwMxC.jpg


b76J0s4.jpg


Stator installation.

lwyxT7Z.jpg
 
Last edited:
6/11/22
Power valve assembly.

After chamfering the ports I was able to proceed with this task.

b6nOniz.jpg


TsCVaIi.jpg


NeqT2DJ.jpg


SZLwihM.jpg
 
Progress is progress. Love the paint results too.
 
5/??/22 start and finished 8/7/22
Front and rear wheel bearing replacement.

wGwWf3q.jpg


Rear wheel went smooth.

aHBojI9.jpg


if2meUr.jpg


On the front wheel a few challenges were encountered. I was unable to get a drift to make contact with the bearing to get it started. Ken’s Garage hack shop had to make a special tool to get the front wheel bearings started.

Ajy9fY6.jpg


In the process I damaged a weird front wheel stamped steel spacer replacement part that needed to be ordered with timing such that I would be home when it arrived.

8S8Ydjv.jpg


Wheel bearing press tool in action.

RY5p07L.jpg


S705uaP.jpg


loKWXAR.jpg


I am sure you noticed the ugly speedo drive. This has been cleaned, blasted, painted, reassembled.

nqVkTTG.jpg
 
8/30/22
Installed rear caliper. I didn't have a proper tool so I had to make a tool to spot face the powder coated caliper bracket mounting surfaces to ensure the caliper sits flush against the bracket.

ItErHya.jpg


It worked.

u2lbZ60.jpg


The rear caliper now mounts properly to the caliper bracket.

XQSF5dB.jpg


Installed front calipers.

wv5AWOc.jpg


Installed rear blinkers.
 
(I keep getting interrupted with work :rolleyes so posting piecemeal. How do they expect me to get my build thread updated efficiently, hmmm?)

8/31/22
Venhill brake line order

Measure existing line from the center of the banjo at each end, or as the diagrams below, then subtract 40mm from the overall length. This gives you the line length you will need.


Front MC to splitter
320-40 = 280
Ordered 300

Front 2 lines from splitter to left and right calipers
495-40 = 455
495-40 = 455
Ordered 450

Rear MC to caliper
275-40 = 235
Ordered 250

Qty (8) M10 20° BANJO, BLACK
Qty (1) 10x1.25mm DOMED DOUBLE BANJO BOLT BLACK
Qty (5) 10x1.25mm DOMED SINGLE BANJO BOLT BLACK
 
(I keep getting interrupted with work :rolleyes so posting piecemeal. How do they expect me to get my build thread updated efficiently, hmmm?)

Sheesh... we haven't even seen any pics from that other event:x
 
9/4/22 and 9/5/22
Repaired harness. Stator wires on the main harness were a bit melty at the interconnect from the stator. A common theme on these bikes it appears. I did the same exact repair on the Thrasher bike https://youtu.be/aGqdsueU8RY April 2021.

cMOQLw2.jpg


It’s hot today.

4I3UjVa.jpg


In Ken’s Garage harness repairs like this always get soldered.

FCKEB6G.jpg


And Monday it’s going to be hotter than yesterday.

A bit of a sidebar here.

Playing with some thermometers on Monday. Did anybody notice that it got FUCKING HOT today?

2fxG2IL.jpg


Meat thermometer I think in the shade

Vcb5dQf.jpg


HoOvyAi.jpg


Pool thermometer in the shade. (I have no idea if this is accurate as this thing is supposed to be submersed in water.)

aDzdnU9.jpg


And then in the sun

xQDuBNJ.jpg


Inside the travel trailer with the vents open and a fan exhausting

5jMiXwb.jpg


Inside the cargo trailer

5JSJBXS.jpg


A screenshot at 9:45 AM

LT2QseP.jpg


A friend from Georgia sent me this he made from the secondary clutch cover

OPUvfSH.jpg


Back to the motorcycle.

The repaired harness is installed.

3yIj11s.jpg


Also installed a couple of horns.
 
9/11/22 Sad day in history :(

This weekend I installed the radiator and filler.

Cleaned and hand polished radiator cover. Ordered M5 well nut to attempt a repair to this cover.

Yjd8OTh.jpg


Cleaned chain guard and 000 steel wooled it using WD40.

gsDFfgV.jpg


6gbKSat.jpg


Ordered pad for cheap orbital car polisher to attempt to polish chain guard. In the past I have attempted using my real buffer on this type of plastic and it burns extremely quick. Against my better judgment I attempted it on this chain guard and burned it. It starts working with a very light pressure and moving very quick but it’s very easy for it to catch something and then you’re done. So I went through many grades of sandpaper standing the burn mark off.


9/14/22

I decided to try a different method to get some threads into this part. Epoxied the cavity of the missing nut on the radiator cover. Cured and tapped it out. I don’t think it’s going to hold but leaving it. The cover is easily removed and drilled for a well nut when it fails. Installed cover.

CNDWuhe.jpg


eah8plb.jpg


Spent hours trying to restore the chain guard. Wet sanded to 1500 then used the orbital buffer. Did not work.

47YQWvN.jpg


Too much time penalty resulted in installing a NOS unit I had in stock (thanks Julian from many years ago). The other one will be used on a custom bike.

Vp7SM0p.jpg
 
Last edited:
Chain guard looks fine to me. :thumbup
 
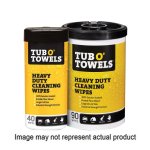
Hey Ken, I've had really good results from using this on the black plastic pieces to renew them.

They're basically like Clorox or Lysol wipes, but for garage type stuff. Cleaned up my rear fender very nicely.
 

Attachments

  • shop towels.jpg
    shop towels.jpg
    158.2 KB · Views: 1
Tub-o-towels are GREAT cleaning cloths. They are my 'go-to' for wiping all the grime and sludge off of the exterior of the BBQ, and other tough cleaning jobs. Never tried plastic, but I definitely will now!
thanks.
 
Thanks mean dad. I'll have to give those a try. Nice, one day to my door step from amazon.
 
Thanks mean dad. I'll have to give those a try. Nice, one day to my door step from amazon.

Or In Stock at your local, friendly O'Reilly Auto parts store!
 
9/15/22

Top End Assembly

Need to do a tiny bit of trimming of the cylinder base gasket to match the case matching that was done on the cases.


rOPeEAE.jpg


Installed pistons, base gaskets. Temporary install of the head to get the cylinders perfectly flat. Tighten cylinder base nuts. Remove head and Inspect cylinder flatness. It looks perfect. Yamaha spec for flatness is .003.


ykJ2Oka.jpg


Squish band measurements were taken.

zavPMXJ.jpg


NYO2DTk.jpg


Final assembly of the top-end is done.

npr5CKx.jpg
 
9/22/22

I decided not to purchase VForce 4 reed valves because they are very expensive from the manufacturer and it’s too much of a risk receiving imitation ones purchasing from anyone else at a discount. There’s lots of horror stories about this. I had a set of TDR single petal fiber reed valves and installed them and the intake manifolds. Pressure tested the engine and it held, no leaks.


CLT5vOv.jpg


WU6uFGw.jpg


9IRkyHL.jpg
 
10/1/22

Installed the engine into the frame. No nicks and no scratches on the beautiful powder coated frame so this is a big win.


3QuWYvf.jpg


BZd8xxR.jpg


JQ1z0qB.jpg


7tTo4J9.jpg


s5c4cm6.jpg
 
Back
Top